Create an Elastigroup for Azure
This topic shows you how to create an Elastigroup in Azure from scratch.
To get started:
- First connect your Azure account to Spot.
- In the Spot Console, select Elastigroup > Groups.
- Click Create Elastigroup.
Click to view image...

These are the steps to create an Elastigroup Group:
- Basics
- Compute
- Networking
- Review
Step 1: Basics
-
These are the Basic settings:
- Elastigroup Name. Use a naming convention based on the specific workload the Elastigroup will manage, for example dev-eu1-worker.
- Description (optional): This should be the purpose of this Elastigroup.
- VM prefix name (optional): The VM prefix name cannot contain spaces, control characters, or these characters: ~ ! @ # $ % ^ & * ( ) = + _ [ ] | ; : . ' ” , < > / ?.
- Resource group.
- Region.
- Availability zones (optional). Specify availability zones that are eligible for your group. It is highly recommended to select multiple availability zones to further diversify the spot markets available to the group.
-
Select an image type (marketplace, custom, or shared image), and an image for launching your VMs.
-
Marketplace: Create the group from an image that is available in the Azure Marketplace.
These are the marketplace parameters:
- Publisher: The organization that created the image to use for launching the VMs.
- Offer: The name of a group of related images created by a publisher. Examples: UbuntuServer, WindowsServer.
- SKU: An instance of an offer, such as a major release of a distribution. Examples: 18.04-LTS, 2019-Datacenter.
:::note: If the marketplace image does not appear in the Publisher list, you can enter the image manually (click on the link provided). :::
-
Custom: Create the group from one of your custom VM Images.
These are the custom image parameters:
- Image Resource Group: A list of Resource Groups associated with your subscription.
- Image Name. This is the label that is assigned to the image.
-
Shared Image: Create the group with an image from your organization’s Shared Image Gallery.
These are the shared image parameters:
- Image Resource Group. A list of Resource Groups associated with your subscription.
- Gallery Name. The list of shared gallery names associated with the selected Resource Group.
- Image Name. List of shared images associated with the selected Gallery. See below for more information.
- Version. The available versions of the selected Image. These will be versions that are available in your selected region. If you need the most recent version, choose Latest from the list.
note -
-
Select your required Security Type, and enter your authentication details.
-
Select one of these options from the Security Type list.
- Standard: This is the basic level of security for your virtual machines.
- Trusted Launch Virtual Machines: Protects against persistent and advanced attacks on Gen 2 virtual machines with configurable features like secure boot and virtual Trusted Platform Module (vTPM).
- Confidential Virtual Machines: On top of Trusted launch, Confidential Virtual Machines offers higher confidentially and integrity guaranteed with hardware-based trusted execution environment.
-
Select at least one available option from the Configured Security Features list.
-
Specify authentication details for launching your VMs:
- Username.
- Your Windows login password.
tipWhen a Specialized Shared Image is specified, you do not need to specify login information.
-
-
Set your required Workload Capacity.
-
Set the workload capacity target, and the minimum and maximum limits:
- Target. The number of low priority VMs in your Elastigroup.
- Minimum. In the case of a scale down policy action, this is the minimum number of low priority VMs that must run in the group. The minimum acceptable value is 0.
- Maximum. In the case of a scale up policy action, this is the maximum number of low priority VMs allowed in the group. The minimum acceptable value is 0.
-
Set a workload capacity option:
- % spot-instances. The percentage of low priority VMs to include in the group. Use the slider to set the percent. The remaining percentage will be on-demand instances.
- Specific on-demand Count. The number of on-demand VMs to include in the group.
-
Step 2: Compute
NEED TO REWRITE
-
Select VM Sizes
-
Select Market Statistics
-
Select from these Availability Settings:
-
Draining Timeout. Set the time (in seconds) to deregister the virtual machine and drain before its termination. During the detachment process, the virtual machine is unregistered from the Load Balancer/Application Gateway, DNS, and other relevant components. Typically, the draining timeout is utilized for load-balanced integrations. In default scenarios, the timeout is set to 120 seconds, but it can be customized or overridden during virtual machine detachment or deployment processes.
-
Cluster Orientation. Specify the prediction algorithm strategy. You can choose for the following:
- Availability. VM selection will be performed to ensure the best market availability within your Elastigroup.
- Cost. VM types will be prioritized by their costs so the selection is based on this list using availability considerations.
- Cheapest. VM selection will be performed by launching the cheapest instances at any time.
-
Fallback to On-Demand. Elastigroup provides a fallback mechanism in case no spot VMs are available. Mark this option if you would like the option to automatically fall back to an on-demand VM in such a case.
-
Continuous Optimization. Choose when Elastigroup may move workloads from on-demand to spot VMs. You may choose from:
- Once Available. Elastigroup moves the workloads when your spot VM types become available.
- Custom. Define one or more time windows in which you allow the move.
-
-
Select the Strategy
-
Set Advanced Options
Step 3: Networking
-
Enter/select the virtual network.
- Virtual Network. Select the specific Virtual Network (VN) for your group.
- Set the public IP SKUs for all network interfaces, with one of these options:
- None
- Basic
- Standard.
-
For this network interface, select these parameters:
- Subnet: Select the Subnet inside your VM.
- Network Security Group: The network security group to associate with the VM.
- Application Security Group: Provides security micro-segmentation virtual networks in Azure and enables you to define network security policies based on workloads (i.e., applications) instead of explicit IP addresses. Choose one or more application security groups the Elastigroup should belong to.
- Assign Public IP. Mark this checkbox if you want VMs in this group to launch with a Public IP. You will then need to choose one or more static public IPs from the dropdown list. The list will include IPs only from availability zones that you have chosen for the Elastigroup.
noteThe items that appear in the list of application security groups depend on the Virtual Network that you selected and may be different in each network.
noteTo minimize ad hoc creation of new IPs on VM launchers:
- Choose IPs that are indicated as No zone/Zone redundant. These will ensure the most AZ flexibility.
- The optimal number of public IPs for the pool is twice your maximum capacity. For example, if your maximum capacity is 6 VMs, then choose at least 12 public IP addresses.
- If you choose zonal IPs (e.g., in zones 1, 2, 3), then distribute them equally across the zones.
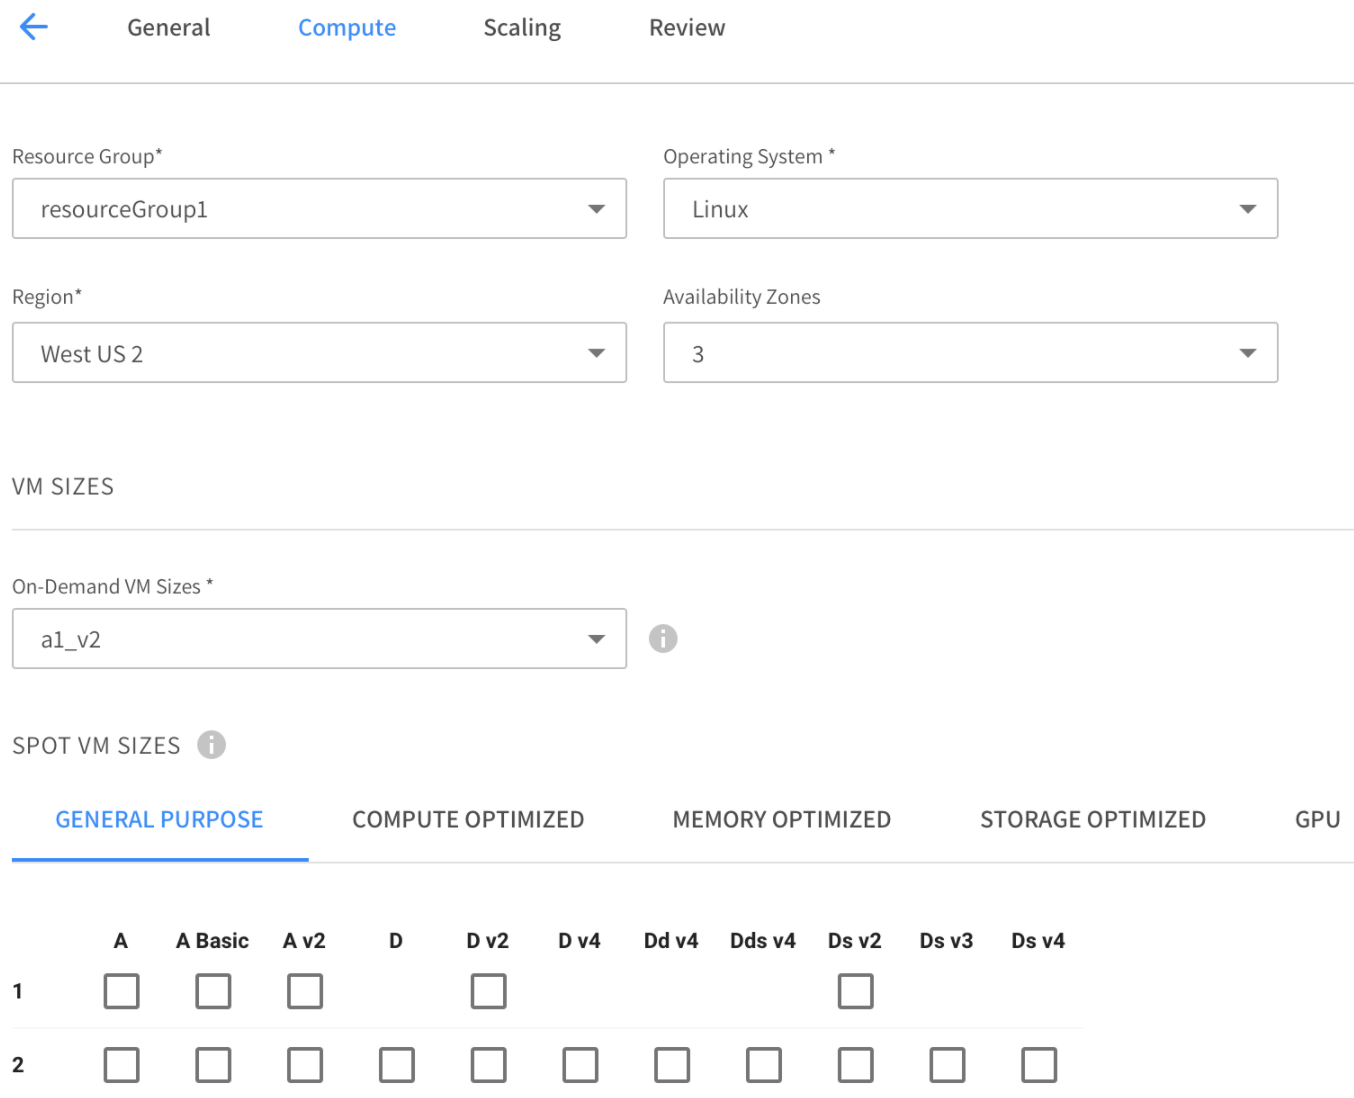
Step 2: Compute
Operating System and VM Sizes
- Resource Group. Choose a resource group.
- Operating System. Choose the OS that will run on your VMs.
- Region. Choose the Azure region the VMS will run in.
- Availability Zones. Choose one or more availability zones where your VMs will be allowed to run. It is highly recommended to choose multiple availability zones to further diversify the spot markets available to the Elastigroup.
- On-Demand VM-Sizes. Choose the regular priority VMs sizes within the Elastigroup. These are used in the event that no Low-Priority VMs are available in the sizes requested. Ensure the selected VMs are available in the desired region.
- Spot-VM Sizes. Select the low priority VM sizes to be available for the Elastigroup. Ensure the selected VM size is available in the desired Region.
To maximize cost savings, provide the Elastigroup with all possible low-priority VM sizes compatible with the expected workload. The more VM sizes, the better the odds Elastigroup will find an available low-priority VM to run on.
Network
Enter the information for your network interface. You can define additional network interfaces as needed.
- Vnet Resource Group. Select the Vnet Resource group you want your Elastigroup Scale Sets to be a part of.
- Virtual Network. Select the specific Virtual Network (VN) for your Elastigroup.
- Set as Primary. The main network interface attached to the VM.
- Subnet ID. Select the specific Subnet inside your VN.
- Resource Group. The resource group where the network interface will be created.
- Network Security Group. The network security group to associate with the VM.
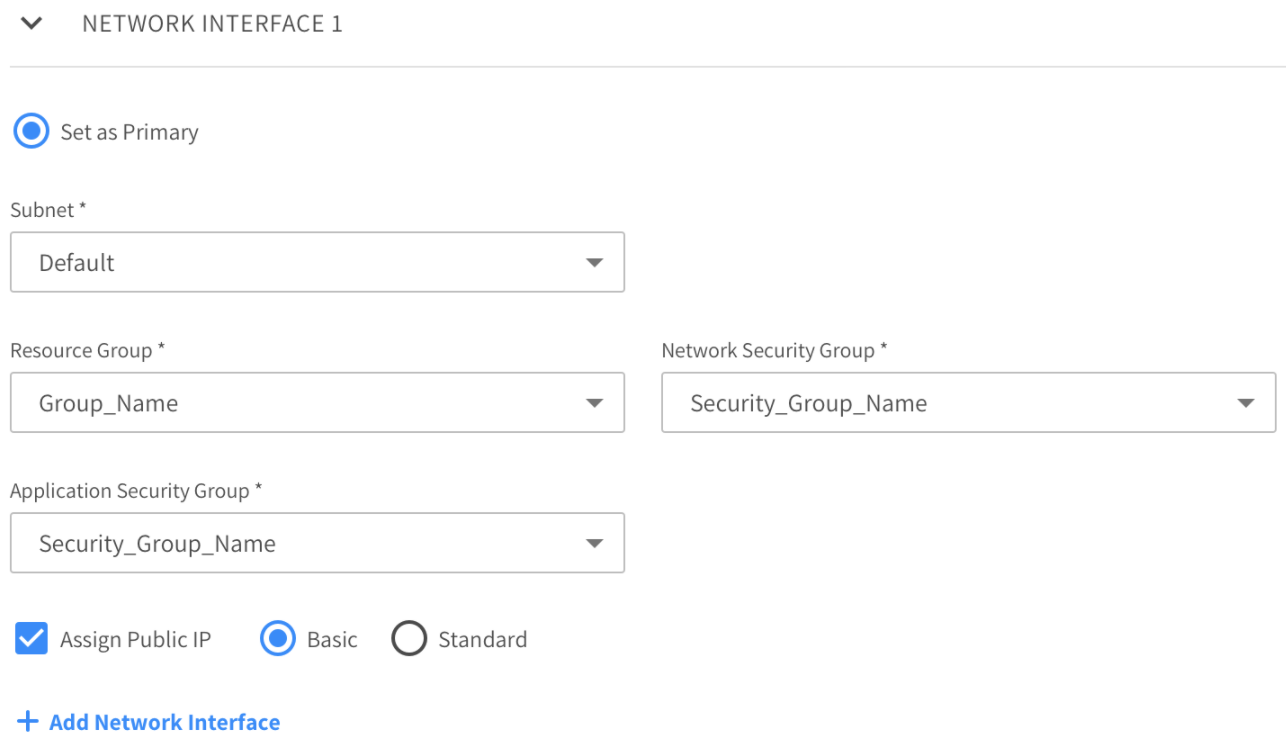
-
Application Security Group: Provides security micro-segmentation virtual networks in Azure and enables you to define network security policies based on workloads (i.e., applications) instead of explicit IP addresses. Choose one or more application security groups the Elastigroup should belong to.
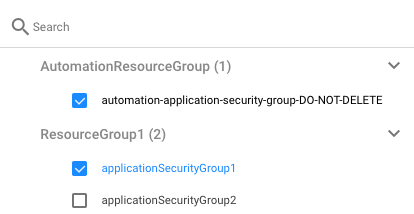
Note that the items appearing in the list of application security groups depend on the Virtual Network that you choose and may be different in each network.
-
Assign Public IP. Mark this checkbox if you want VMs in this Elastigroup to launch with a Public IP. You will then need to choose one or more Static Public IPs from the dropdown list. The list will include IPs only from AZs that you have chosen for the Elastigroup.
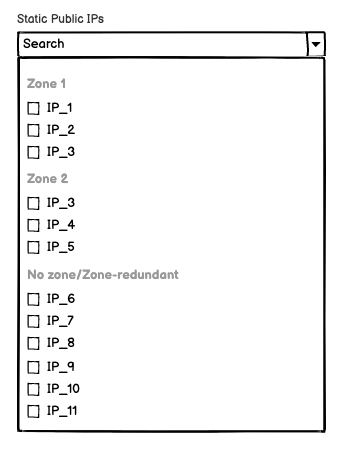
More on Choosing Public IPs
To minimize ad hoc creation of new IPs on VM launchers:
- Choose IPs that are indicated as No zone/Zone redundant. These will ensure the most AZ flexibility.
- The optimal number of public IPs for the pool is twice your maximum capacity. For example, if your maximum capacity is 6 VMs, then choose at least 12 public IP addresses.
- If you choose zonal IPs (e.g., in zones 1, 2, 3), then distribute them equally across the zones.
Login
- User Name. Specify the username you wish to SSH the VMs with.
- Windows Password. The password you use for your Windows login.
When a Specialized Shared Image is specified, you do not need to specify login information.
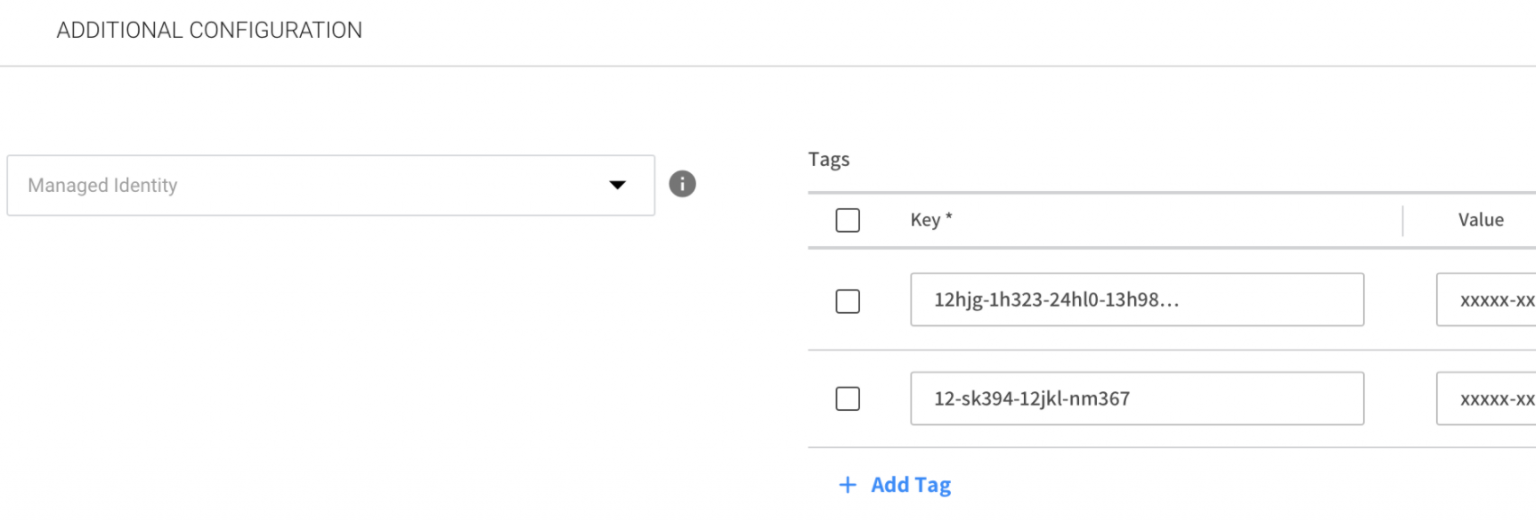
Additional Configuration (optional)
-
Managed Identity. Select the Managed Identity for your VMSS instances.
-
Tags. Add tag keys and values you want associated with the Elastigroup VMs.
-
Custom Data. You can configure a script that will run during every VM startup. It’s useful for launching VMs with all the preset configurations and software installations. Elastigroup can load custom user data (such as custom scripts) when provisioning VMs. Custom data is not available for specialized shared images.
Make sure your script doesn’t require additional extensions. For example, you may need to add an extension for custom data to work.
Extension for custom data
In the group > compute > launchSpecification > extensions, add the extension. For example:
   "extensions": [
       {
         "name": "extensionName",
         "type": "customScript",
         "publisher": "Microsoft.Azure.Extensions",
         "apiVersion": "2.0",
         "minorVersionAutoUpgrade": true,
         "publicSettings": {},
         "protectedSettings": {},
         "enableAutomaticUpgrade": false,
         "protectedSettingsFromKeyVault": {
           "sourceVault": "/subscriptions/1234-1234-1234/resourceGroups/rg_test/providers/Microsoft.KeyVault/vaults/testKeyVault",
           "secretUrl": "https://testKeyVault.vault.azure.net/secrets/SecretTest/123456"
         }
       }
     ],
-
Shutdown Script. You can configure a shutdown script, but this requires an agent to be installed on the instance.
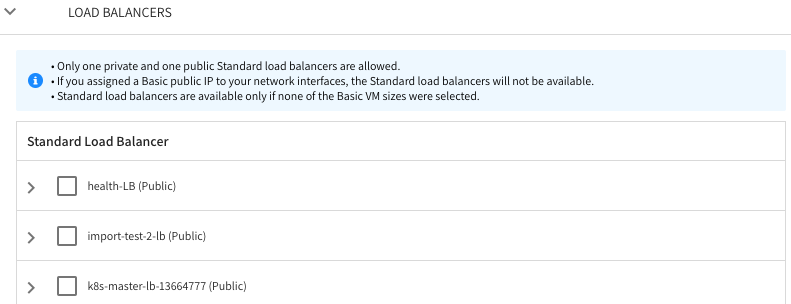
Load Balancers (optional)
You can add a load balancer. Elastigroup will automatically register new VMs to the configured load balancer.
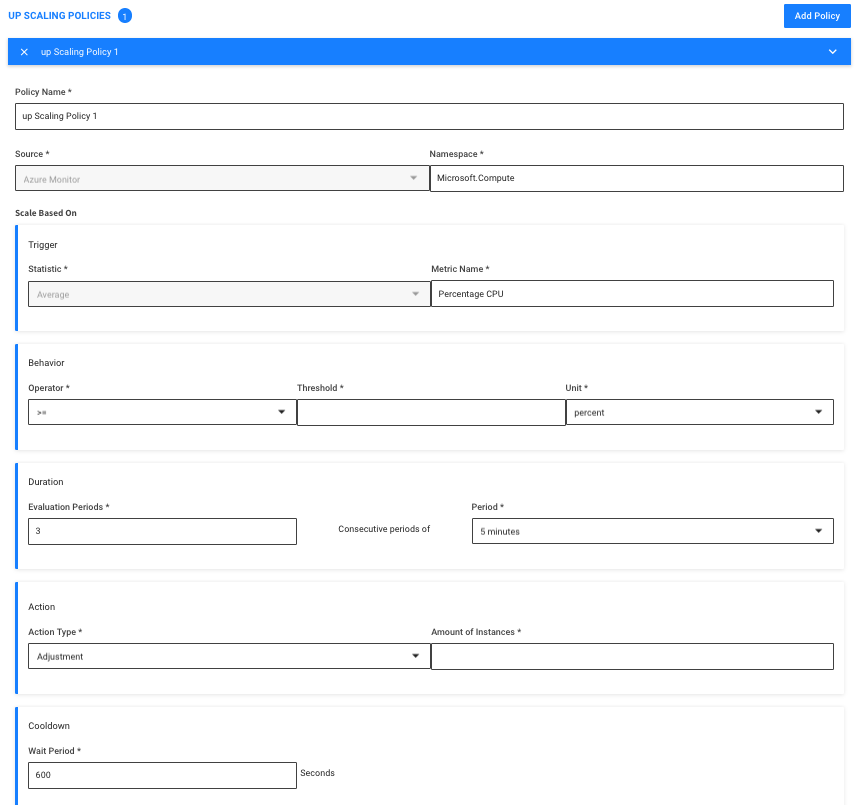
Step 3: Scaling
Optionally, create scaling policies for your Elastigroup based on Azure Monitor metrics. A policy can be for scale up or scale down.
To create a scaling policy, complete the following steps.
-
Click Add Policy.
-
Set policy name.
-
Specify a Namespace (default is Microsoft.Compute).
-
Set scale based on values: Choose Trigger (Metric Name), Behavior.
-
Set Duration to determine the number of tests (and duration between them) to activate the policy.
-
Choose the action type:
- Adjustment. Will add instances on up scaling and remove on down scaling policies. You need to set the number of instances.
- Set the minimum target.
- Update Capacity. In terms of Target Minimum and Maximum.
- Percentage Adjustment. Add or Remove a percentage of the group active capacity, for Up and Down scaling respectively.
-
Cool-down.
- Wait Period is the time (in seconds) that all scaling activities will be suspended after the scaling policy is triggered.
Step 4: Review
-
Review your configuration in JSON format in the Review tab. You can edit the JSON directly by switching on Edit mode.
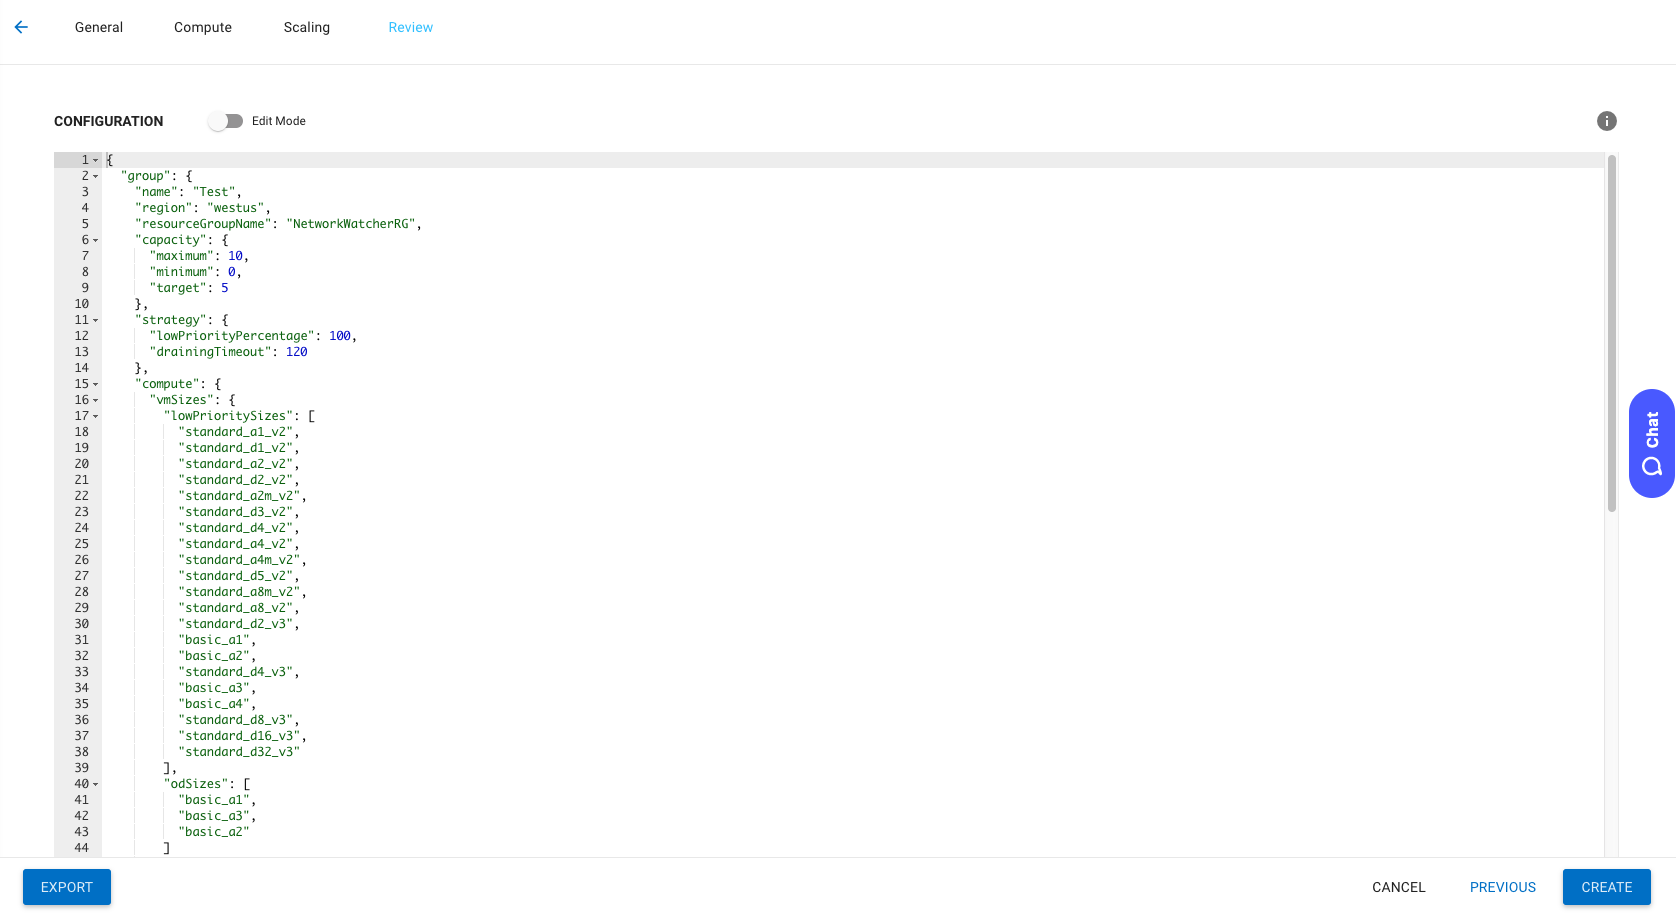
-
To create the Elastigroup, click Create.